Alright, so in this article, “A Beginner’s Guide to Using the WordPress Block Editor,” we will walk you through all the steps of using the WordPress block editor. This video tutorial is specifically designed for beginners. The block editor is a point-and-click editor that can make website creation easier for those who may not have strong visual design skills. We will cover everything from installing and activating a new theme to customizing the appearance of your website. Additionally, we will emphasize the importance of SEO optimization, showcasing examples of how even less visually appealing websites can still rank well in search engines. Stay tuned for part two of this series, where we will delve into the SEO side of website creation, including on-page and off-page SEO techniques. So, let’s get started and learn how to effectively use the WordPress block editor to create your own stunning website!
Getting Started
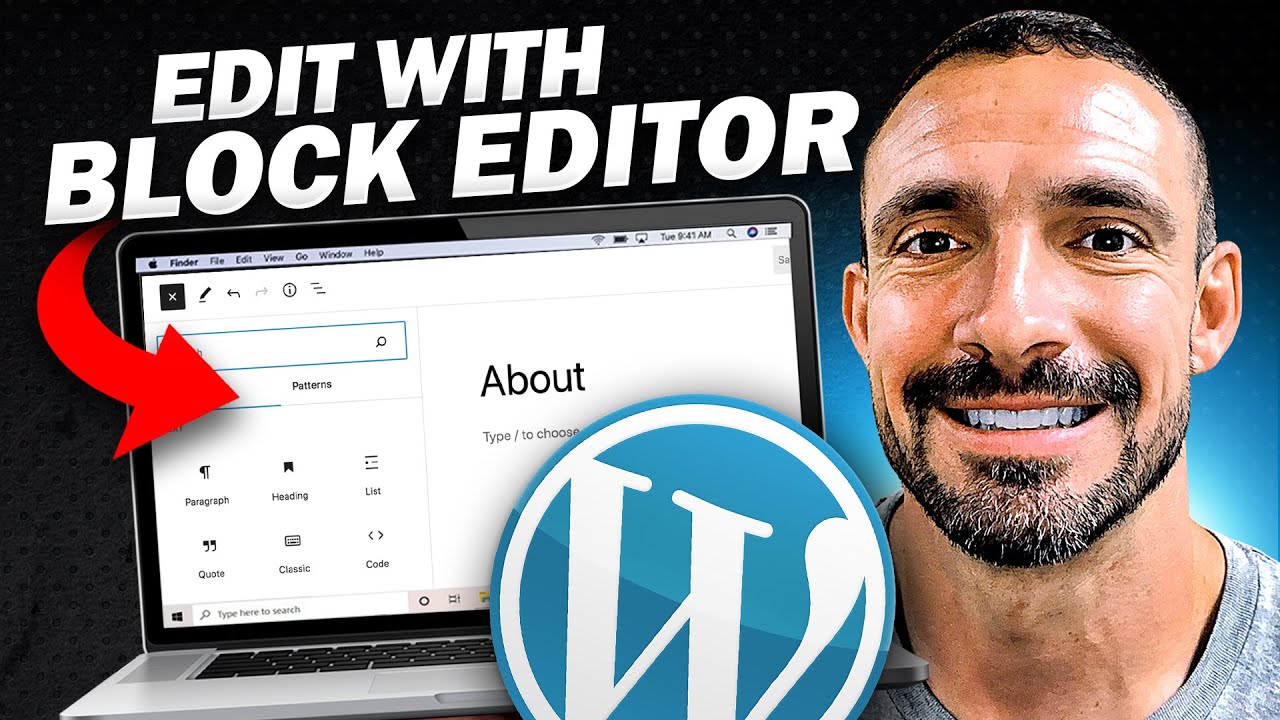
Introduction to the WordPress Block Editor
The WordPress Block Editor is a user-friendly interface that allows you to create and customize your website by using block-based content. Unlike the classic editor, the block editor offers a point-and-click approach to website creation, making it easier for beginners to design and build their own websites. With the block editor, you can easily add, arrange, and customize various blocks of content to create a visually appealing and professional-looking website.
Installing and Activating the Block Editor
To start using the block editor, you will need to install and activate a theme that supports this editor. The theme acts as the foundation for your website design and determines the layout and appearance of your site. There are various block editor themes available, including the popular Fort theme.
To install the block editor theme, follow these steps:
- Access your WordPress dashboard.
- Go to “Appearance” and click on “Themes.”
- Click on the “Add New” button.
- Search for the block editor theme you want to install, such as the Fort theme.
- Once you find the theme, click on the “Install” button.
- After successful installation, click on the “Activate” button to activate the theme.
Once the block editor theme is activated, your website will have a new look and feel. However, it’s important to note that activating a new theme will not delete the content you created using the classic editor. Your content will still be available, but it may be displayed differently based on the settings and blocks used in the new theme.

Exploring the Block Editor Interface
Overview of the Block Editor Interface
When you switch to the block editor, you will notice a new interface that is specifically designed for block-based content creation. The interface consists of various elements that allow you to work with blocks and customize your website.
Some key elements of the block editor interface include:
- Block Toolbar: This toolbar appears when you select a block and provides options to align, style, and format the selected block.
- Block Navigation: You can easily navigate through your content using the block navigation feature, which displays a list of all the blocks on your page.
- Block Library: The block library houses a wide range of pre-built blocks that you can add to your content. These blocks can be customized to suit your needs.
- Document Settings: The document settings panel allows you to configure various settings for your website, such as the title, URL slug, and featured image.
- Block Settings: Each block has its own settings that can be accessed and customized through the block settings panel. These settings allow you to adjust the appearance and functionality of each block.
Understanding the Block Library
The block library is a collection of various blocks that you can use to add different types of content to your website. Each block serves a specific purpose, such as adding text, images, videos, buttons, and more.
To access the block library, click on the plus icon located at the top left corner of the editor. This will open a panel displaying the available blocks. You can search for specific blocks or browse through different categories, such as common blocks, formatting blocks, layout elements, and more.
Once you have selected a block, you can simply drag and drop it onto your page. You can then customize the block by adding content, adjusting settings, and rearranging its position within the page.
Using Blocks to Create Content
The block editor allows you to create content by adding and arranging blocks. Each block represents a specific type of content, such as paragraphs, headings, images, galleries, lists, and more. By combining and customizing these blocks, you can create engaging and visually appealing pages for your website.
To add a block, simply click on the plus icon located at the top left corner of the editor. From the block library panel, select the desired block and it will be added to your page. You can then edit the block by adding text, media, or making any necessary adjustments.
To rearrange blocks, you can use the block navigation feature or drag and drop the blocks to the desired position. This allows you to easily modify the layout and structure of your content.
Managing Block Settings
Each block in the block editor has its own settings that can be customized to fit your needs. These settings allow you to adjust the appearance, layout, and functionality of each block.
To access the block settings, simply select the block you want to modify. The block settings panel will appear, displaying all available options for that particular block. For example, if you have added an image block, the settings panel will allow you to adjust the image size, alignment, caption, and other related settings.
By exploring and utilizing the block settings, you can customize each block to match your design preferences and create a unique and personalized website.
Arranging and Reorganizing Blocks
One of the advantages of using the block editor is the flexibility it offers in terms of arranging and reorganizing blocks. You can easily rearrange the position of blocks within your page, allowing you to experiment with different layouts and visual arrangements.
To rearrange blocks, simply click on the block and drag it to a new position. The other blocks will automatically adjust their position accordingly. This gives you the freedom to create dynamic and interactive pages without the need for complex coding or design skills.
By experimenting with different block arrangements, you can find the layout that best represents your content and engages your website visitors.
Customizing the Appearance
Selecting and Customizing Themes
The appearance of your website plays a crucial role in attracting and retaining visitors. With the block editor, you have the ability to change and customize themes to achieve your desired look and feel.
To select and customize a theme, follow these steps:
- Access your WordPress dashboard.
- Go to “Appearance” and click on “Themes.”
- Click on the “Add New” button.
- Browse through the available themes or use the search function to find a specific theme.
- Once you have found a theme, click on “Install” and then “Activate” to apply it to your website.
- After activating the theme, you can further customize its appearance by accessing the theme settings.
The theme settings panel allows you to make changes to various aspects of your theme, such as colors, typography, header and footer, and other customizable options. By adjusting these settings, you can create a unique and visually appealing website that aligns with your brand and personal preferences.
Customizing Typography and Colors
Typography and colors can significantly impact the overall look and feel of your website. The block editor provides easy-to-use customization options for typography and colors, allowing you to create a cohesive and visually appealing design.
To customize typography, follow these steps:
- Access your WordPress dashboard.
- Go to “Appearance” and click on “Customize.”
- In the customization panel, look for the typography settings.
- Select the desired font styles, sizes, and weights for different elements of your website, such as headings, paragraphs, and buttons.
To customize colors, follow these steps:
- Access your WordPress dashboard.
- Go to “Appearance” and click on “Customize.”
- In the customization panel, navigate to the color settings.
- Adjust the colors for various elements of your website, such as background color, text color, link color, and more.
By customizing typography and colors, you can create a visually consistent and aesthetically pleasing website that reflects your brand identity.
Adding Custom CSS
If you have advanced coding knowledge or specific design requirements, you can use custom CSS to further modify the appearance of your website. Custom CSS allows you to override the default styles provided by your theme and add your own custom styles.
To add custom CSS, follow these steps:
- Access your WordPress dashboard.
- Go to “Appearance” and click on “Customize.”
- In the customization panel, look for the additional CSS settings.
- Enter your custom CSS code in the provided field.
By adding custom CSS, you can make precise design modifications and achieve a unique and customized look for your website.
Working with Backgrounds
Backgrounds play a crucial role in creating a visually appealing and engaging website. With the block editor, you can easily customize and add backgrounds to different sections of your website.
To customize backgrounds, follow these steps:
- Access your WordPress dashboard.
- Go to “Appearance” and click on “Customize.”
- In the customization panel, navigate to the background settings.
- Choose the section you want to customize, such as the header, footer, or individual blocks.
- Select the desired background color, image, or pattern.
- Adjust any additional settings, such as background position, repeat, or size.
By experimenting with different background options, you can enhance the visual appeal of your website and create a cohesive and immersive user experience.
Managing Menus and Navigation
Menus and navigation are essential for guiding visitors through your website and helping them find the information they need. With the block editor, you can easily customize menus and navigation to create a user-friendly and intuitive website structure.
To manage menus and navigation, follow these steps:
- Access your WordPress dashboard.
- Go to “Appearance” and click on “Menus.”
- Create a new menu or select an existing one.
- Add pages, categories, custom links, or other elements to your menu.
- Organize the items in the menu by dragging and dropping them.
- Configure additional settings, such as menu location, display options, and menu behavior.
By carefully organizing and customizing your menus and navigation, you can enhance the user experience and make it easier for visitors to navigate your website.
SEO Optimization
Understanding the Importance of SEO
Search Engine Optimization (SEO) is a critical aspect of website creation as it enables your website to rank higher in search engine results and attract organic traffic. By optimizing your website for search engines, you can improve its visibility, reach, and overall success.
SEO involves various strategies and techniques, such as keyword research, on-page optimization, off-page optimization, and more. The block editor provides a solid foundation for implementing SEO practices and optimizing your website for better search engine rankings.
Optimizing On-Page SEO
On-page SEO refers to the practices and optimizations that can be done directly on your website to improve its search engine visibility. With the block editor, you can easily implement on-page SEO techniques without any coding skills.
Some key on-page SEO optimizations you can implement using the block editor include:
- Adding relevant keywords to your page titles, headings, and content.
- Optimizing meta descriptions to improve click-through rates from search engine results.
- Including alt text for images to improve accessibility and search engine indexing.
- Creating keyword-rich URLs for your pages and posts.
- Implementing internal linking to improve website navigation and SEO.
By incorporating these on-page SEO strategies into your content and website structure, you can improve your website’s visibility in search engine results and attract more targeted traffic.
Utilizing Off-Page SEO Techniques
Off-page SEO refers to the practices and optimizations that take place outside of your website but still have an impact on your search engine rankings. The block editor provides a solid foundation for implementing off-page SEO techniques and optimizing your website’s online presence.
Some off-page SEO techniques you can utilize include:
- Building high-quality backlinks from reputable websites that are relevant to your content.
- Engaging in social media marketing to increase brand awareness and drive traffic to your website.
- Participating in online communities, forums, and discussions related to your industry to establish thought leadership and drive traffic to your website.
- Guest blogging on other authoritative websites to generate backlinks and increase your website’s visibility.
By incorporating off-page SEO techniques alongside your on-page optimizations, you can greatly improve your website’s search engine rankings and increase its online visibility.
Plugin Recommendations for SEO
WordPress offers a wide range of plugins that can help enhance your SEO efforts and further optimize your website. These plugins provide additional features and functionalities that can improve your website’s performance in search engine rankings.
Some recommended SEO plugins for WordPress include:
- Yoast SEO: This plugin offers a comprehensive set of features to optimize your website for search engines, including on-page analysis, XML sitemap generation, and more.
- All in One SEO: Another popular SEO plugin that provides a range of features, including XML sitemap generation, meta tag optimization, and social media integration.
- Rank Math: This plugin offers advanced SEO features, such as keyword optimization, schema markup, redirection management, and more.
By installing and configuring these SEO plugins, you can further enhance your website’s visibility and improve its chances of ranking higher in search engine results.
Analyzing Website Performance
Analyzing your website’s performance is crucial for understanding how well your SEO efforts are working and identifying areas for improvement. With the block editor, you can easily integrate analytics tools and monitor various aspects of your website’s performance.
Some popular website analytics plugins for WordPress include:
- Google Analytics: This free tool allows you to track and analyze various metrics related to your website’s performance, such as total visitors, traffic sources, bounce rate, and more.
- MonsterInsights: A user-friendly plugin that integrates Google Analytics with your WordPress website, providing detailed insights and reports to help you monitor and optimize your website.
By regularly analyzing your website’s performance through these analytics plugins, you can gain valuable insights into visitor behavior, identify areas for improvement, and make data-driven decisions to enhance your website’s performance.
Advanced Block Editor Features
Using Advanced Blocks
The block editor offers a wide range of advanced blocks that allow you to customize and enhance your website’s functionality. These blocks provide additional features and functionalities that can take your website to the next level.
Some examples of advanced blocks you can utilize include:
- Advanced Image Gallery: This block allows you to create stunning image galleries with various layouts, hover effects, and captions.
- Testimonials Slider: This block enables you to showcase customer testimonials in a dynamic and interactive slider format.
- Pricing Table: This block allows you to create attractive pricing tables with customizable features and options.
By exploring and incorporating advanced blocks into your website, you can create a more interactive and engaging user experience that sets your website apart from the competition.
Creating Custom Blocks
In addition to the pre-built blocks provided by the block editor, you can also create your own custom blocks to meet specific design and functionality requirements. Creating custom blocks requires advanced coding skills but allows you to tailor the blocks to your exact needs.
To create custom blocks, you can utilize various WordPress development tools and resources, such as the Block Editor Handbook and the Gutenberg Development Course. These resources provide step-by-step instructions and guides on how to create custom blocks and extend the functionality of the block editor.
By creating custom blocks, you can unlock endless possibilities for designing and customizing your website, making it truly unique and tailored to your specific needs.
Working with Block Templates
Block templates are pre-designed block layouts that can be easily imported and customized to create specific types of pages or sections on your website. Block templates provide a quick and efficient way to build and structure your website without starting from scratch.
To use block templates, follow these steps:
- Access your WordPress dashboard.
- Go to “Block Editor” and click on “Block Templates.”
- Browse through the available templates or use the search function to find a specific template.
- Once you have found a template, click on “Insert” to add it to your page.
- Customize the imported template by adding your own content, adjusting settings, and rearranging blocks as needed.
By leveraging block templates, you can save time and effort in designing and building your website, ensuring consistency and efficiency throughout the site.
Collaborating with Others in the Block Editor
The block editor allows for seamless collaboration and teamwork, enabling multiple users to work on the same website simultaneously. This feature is particularly useful for teams and businesses that need to coordinate and manage website content and design.
To collaborate with others in the block editor, follow these steps:
- Access your WordPress dashboard.
- Go to “Users” and click on “Add New.”
- Create user accounts for each collaborator, providing them with the necessary roles and permissions.
- Once the user accounts are set up, each collaborator can access the block editor and start working on the website using their own account.
- The block editor automatically saves changes made by each user, allowing for real-time updates and collaboration.
By leveraging the collaboration features of the block editor, you can streamline your website creation process, improve productivity, and ensure a cohesive and consistent design throughout your site.
Troubleshooting Common Block Editor Issues
While the block editor offers a user-friendly interface, you may still encounter some issues or challenges along the way. Understanding and troubleshooting these common issues will help you navigate through them and continue using the block editor effectively.
Some common block editor issues and their solutions include:
- Block Placement: If you are experiencing difficulty placing blocks where you want them, try using the block navigation feature or adjusting the block settings for proper alignment.
- Block Compatibility: Not all blocks are compatible with all themes and plugins. If you encounter compatibility issues, try using alternative blocks or consider using compatible themes and plugins.
- Block Styling: If you want to change the appearance or styling of a block, explore the block settings, custom CSS, or consider using an advanced block plugin that offers additional styling options.
By troubleshooting these common block editor issues, you can continue using the block editor effectively and overcome any obstacles in your website creation process.
Taking Your Website to the Next Level
Adding E-Commerce Functionality
If you are looking to sell products or services online, adding e-commerce functionality to your website is essential. With the block editor, you can easily integrate e-commerce plugins, such as WooCommerce, to create a fully functional online store.
To add e-commerce functionality, follow these steps:
- Access your WordPress dashboard.
- Go to “Plugins” and click on “Add New.”
- Search for the e-commerce plugin you want to install, such as WooCommerce.
- Once you find the plugin, click on “Install” and then “Activate” to activate the plugin.
- Follow the setup wizard to configure your online store, including adding products, payment gateways, and shipping options.
- Customize the appearance of your store using the block editor and the customization options provided by the e-commerce plugin.
By integrating e-commerce functionality into your website, you can expand your business and reach a wider audience of potential customers.
Integrating Social Media
Social media integration is essential for boosting your online presence, increasing brand awareness, and driving traffic to your website. With the block editor, you can easily add social media sharing buttons and links to your website, allowing visitors to engage with your content and share it with their networks.
To integrate social media, follow these steps:
- Access your WordPress dashboard.
- Go to “Plugins” and click on “Add New.”
- Search for social media plugins, such as Simple Social Icons or Shared Counts.
- Install and activate the desired social media plugin.
- Configure the plugin settings to add social media sharing buttons and links to your website.
- Customize the appearance and placement of the social media icons using the block editor and the customization options provided by the plugin.
By integrating social media into your website, you can foster engagement, build a loyal community, and increase your online visibility.
Implementing Advanced SEO Strategies
In addition to basic SEO optimizations, implementing advanced SEO strategies can further enhance your website’s search engine rankings and visibility. With the block editor, you can easily implement advanced SEO techniques without any coding skills.
Some advanced SEO strategies you can implement using the block editor include:
- Schema Markup: Utilize schema markup blocks to provide search engines with additional structured data about your website and improve the display of your search engine results.
- Rich Snippets: Add rich snippets to your content, such as reviews, ratings, or product information, to enhance the visibility and click-through rates of your search engine results.
- Mobile Optimization: Use responsive blocks and ensure that your website is optimized for mobile devices, as mobile-friendliness is an important ranking factor for search engines.
By incorporating these advanced SEO strategies into your website, you can maximize your chances of ranking higher in search engine results and attracting more targeted organic traffic.
Adding Contact Forms and Lead Generation
Contact forms and lead generation are essential for capturing visitor information and converting them into potential customers. With the block editor, you can easily add contact forms and lead generation elements to your website, allowing visitors to connect with your business.
To add contact forms and lead generation elements, follow these steps:
- Access your WordPress dashboard.
- Go to “Plugins” and click on “Add New.”
- Search for contact form plugins, such as Contact Form 7 or WPForms.
- Install and activate the desired contact form plugin.
- Configure the plugin settings and create customized contact forms to capture visitor information.
- Add the contact form to your desired pages or posts using the block editor.
By incorporating contact forms and lead generation elements into your website, you can nurture leads, improve customer communication, and increase your chances of converting visitors into customers.
Exploring Advanced Theme Customization
While the block editor provides a wide range of customization options, advanced theme customization can further enhance the appearance and functionality of your website. With the block editor, you can easily modify and customize various aspects of your theme to create a unique and visually appealing design.
Some advanced theme customization options you can explore include:
- Custom Headers and Footers: Modify the layout and content of your headers and footers using block-based elements, such as navigation menus, social media icons, logo placement, and more.
- Layout Customization: Customize the overall layout of your website, including the number of columns, sidebars, and widget areas, to create a unique and dynamic design.
- Animation and Interactivity: Utilize block animations and interactive elements to create an engaging and memorable user experience.
By exploring advanced theme customization options, you can create a visually stunning and highly functional website that stands out from the competition.
Conclusion
The WordPress Block Editor is a powerful tool that allows beginners to create and customize their websites with ease. By understanding the various features and functionalities of the block editor, you can take full advantage of its capabilities to enhance the appearance, functionality, and SEO optimization of your website.
From installing and activating the block editor to exploring advanced customization options, the block editor provides a comprehensive and user-friendly interface for website creation. By optimizing your website for search engines, utilizing advanced blocks and features, and incorporating e-commerce and social media functionalities, you can take your website to the next level and achieve your online goals.
Remember, the block editor is continuously evolving, with new blocks and features being added regularly. Stay updated with the latest developments and improvements to make the most of the block editor and create a website that not only looks great but also performs well in search engine rankings and engages your website visitors.